Hatchery flooring and drainage
Tags: Hatchery management | Whitepaper
, 2 March 2012

The quality and construction of hatchery flooring can contribute significantly to operational productivity and cost-efficiency.
Load bearing capacity is established from a concrete base layer, reinforced with steel or concrete, depending on the strength and stability of the natural substrate. Building then continues upwards, starting with a sub-base of compacted granular material or lean-mix concrete, followed by a damp-proof layer, insulation, reinforced concrete and a water-tight top finish.
Completed, the floor is flat and level, highly resistant to pressure washing and chemicals, and strong enough to withstand both concentrated and moving (wheeled) loads. A loaded 115k egg capacity incubator weighs approx. 450kg/m2, while trolleys filled with hatching eggs, repeatedly travelling the same path on typically polyamide or vulcanized rubber wheels, generate very high contact pressures of ± 50N/mm2.
An hygienic, easy to clean, anti-skid surface can be achieved with a monolithic (poured as a single slab) build-up, mechanically sanding then plastering the surface, which is finally sprinkled with a wear resistant additive during drying.
Alternatively, and more commonly in modern hatcheries, a cement-bonded base with synthetic finishing layers delivers better performance and durability. Combined with Microban®, the synthetic resin surface also provides continuous antimicrobial protection.
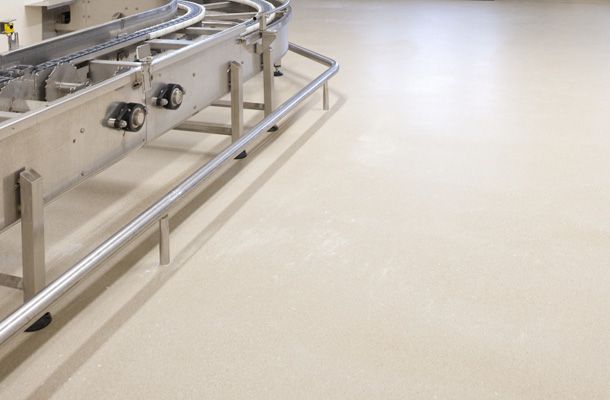
Seamless, mechanical installation creates a hygienic, extremely hardwearing finish, with the resin layering process delivering improved chemical and thermal resistance, durability and easy maintenance over time. Resin screeds also create a good seal with walls and can be installed with skirting, for improved cleaning. This type of flooring is fully chemically bonded to the concrete substrate, which prevents the collection of dirt or bacterial contamination in joints or hollows under the finished floor.
High-speed installation produces greater efficiency in the building schedule, ultimately reducing total project lead-times.
Drainage is factored into the build of the floor, with a slope to remove wastewater and promote good drainage.
Drains and gulleys are situated in processing areas and passages, where easy access for regular cleaning reduces the level and subsequent risk of contamination. With a smooth, durable surface, stainless (AISI 304) drains are easily cleaned and strong enough to support the weight of moving loads. Wide, grilled drains are recommended for areas such as the hatcher room, washing and chick handling areas, where a larger capacity is more efficient for the removal of egg shell and other detritus during washdowns. Narrow drains are suitable in hallways and less polluted areas.
Advice
Floors:
- Consult a concrete specialist, to specify the floor correctly for purpose, load and long-life.
- Prevent cracking by reinforcing the concrete with steel.
- Level the floors under setters and hatchers within 2mm per 1000mm, and flat to within 3mm per 1000mm (Class 2 conform NEN-2747 ).
- Place floor joints in the center of panel walls, not under hatchery equipment, whenever possible.
- Avoid the use of glazed floor tiles, which create a slip-hazard when wet and are prone to cracking and breaking, which creates dirt-traps.\
- Select an installation supplier who will honour a guarantee on your floors.
- Consider using Microban® in the finishing layer, for continuous antimicrobial protection.
Drains:
- Locate drains close to setters and hatchers, to remove wastewater from washing between cycles and help to dry these areas thoroughly and quickly.
- Install floor drains with the recommended slope or grade of 1%.
- Select the pitch or mesh rating for drain grills and gulley covers such that waste water and small eggshell particles are washed away effectively, without impeding or disrupting the travel of trolleys carrying eggs.
- Build-in floor drains to a depth of c.160mm, with suitable piping of 110/125mm.
- Install a waste trap at the end of each drain, to prevent fluff and solid waste from entering the drain piping system.
Picture showing Bolidtop 700 floor, Photo courtesy of Bolidt.
Written by Férenc Elshof
Project Manager
I welcome your feedback on this article - and if you require any additional information, please don't hesitate to contact me.